Dungeon Walkthrough & Map Guide
Tame Me Hard! features a variety of dungeon environments, each with unique creature spawns, layout patterns, and loot opportunities. Understanding how each dungeon type works is essential for efficiently capturing and training creatures to sell for profit and pay off your debt before time runs out.
Dungeon Types Overview
As a side-scrolling dungeon crawler, Tame Me Hard! presents several distinct dungeon types for players to explore. Each dungeon category features its own environmental theme, creature roster, and layout structure. Progressing through areas typically requires clearing enemy packs before advancing to the next section, so be prepared to fight through every encounter rather than attempting to rush past groups.
Dungeon selection plays a critical role in your overall debt repayment strategy. Different dungeon types yield different creature varieties, and since your primary income comes from capturing, training, and selling these creatures, choosing the right dungeon at the right time can make or break a run. Early on, focus on lower-difficulty dungeons to build up a stable of trainable creatures before tackling more dangerous areas.
Pay close attention to the dungeon entrance indicators, which signal the types of creatures you can expect to encounter inside. Matching your current equipment and capture tools to the dungeon's inhabitants will significantly improve your success rate and reduce wasted time on failed expeditions.
Enemy Spawns and Encounter Patterns
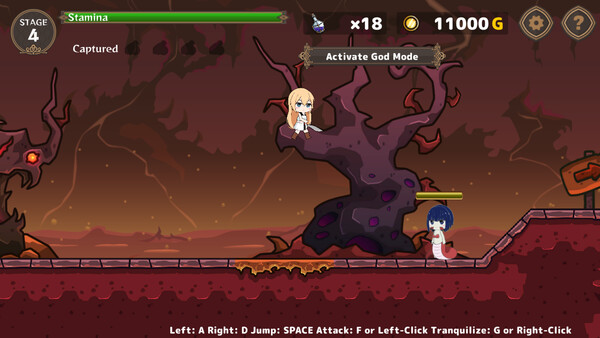
Creatures within each dungeon follow specific spawn patterns tied to the room or corridor you enter. Most areas are gated, meaning you must defeat or capture each group of enemies before the path forward opens. Encounters generally start with smaller, weaker creatures near the dungeon entrance and escalate in both number and difficulty as you push deeper into the layout.
Some encounters feature creatures that fixate on the player and chase aggressively, while others remain stationary and use ranged or area-based attacks. Learning each creature type's behavior is key to deciding whether to fight for resources or attempt a capture. Creatures that swarm in large numbers can overwhelm an unprepared adventurer, so managing engagement distance and using the side-scrolling terrain to your advantage is essential.
Boss-type creatures appear at set points within dungeons and typically have unique attack patterns, including targeted marks and area-of-effect abilities. These encounters often spawn additional smaller creatures during the fight, requiring you to balance dealing damage to the boss while managing the adds that appear throughout the battle.
Capture, Training, and Loot Strategy
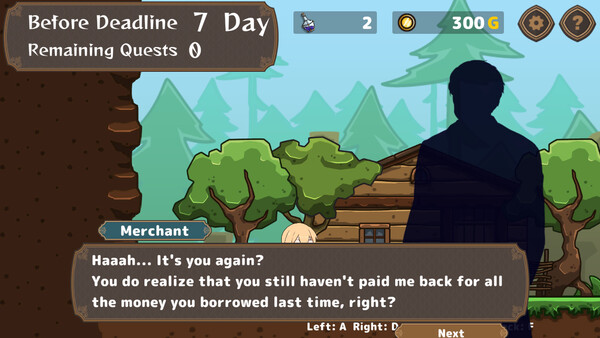
The core gameplay loop revolves around capturing creatures encountered in dungeons and then training them to increase their sale value. Not every creature is worth capturing—some are more profitable to simply defeat for immediate resource drops, while rarer specimens found in deeper dungeon sections command significantly higher prices when properly trained.
Loot obtained from dungeon runs includes both direct resource drops from defeated creatures and the creatures themselves when successfully captured. Balancing your inventory between sellable resources and captured creatures is an important consideration, especially when operating under the game's time pressure to pay off your debt. Prioritize high-value captures over common drops whenever possible to maximize your income per dungeon run.
Difficulty Scaling and Progression
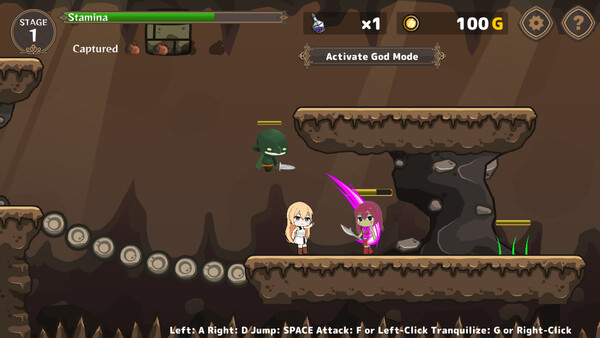
Dungeon difficulty scales as you progress through the game, with later dungeon types introducing tougher creatures, more complex layouts, and more punishing encounter combinations. The scaling is designed to match your expected progression in equipment and creature-handling ability, so attempting to skip ahead to higher-difficulty dungeons without adequate preparation is likely to result in failure.
Because the game imposes a time limit on debt repayment, there is a natural tension between farming safer dungeons for consistent returns and pushing into harder content for greater rewards. Experienced players often develop routes that balance risk and reward, identifying which dungeon types offer the best profit-per-time ratio at each stage of a playthrough.
Revisiting earlier dungeons remains viable throughout the game since creature capture and training profits can still contribute meaningfully to debt repayment. However, the most efficient path to clearing your debt typically involves graduating to harder dungeons as soon as your gear and skills allow, reserving easier runs for recovery periods after a particularly costly failed attempt.
Recommended Strategies and Tips
When entering any dungeon, take stock of your current equipment, capture supplies, and available inventory space before committing to a run. Running out of capture tools mid-dungeon means losing out on valuable creatures, and a full inventory forces you to leave potential profits behind. Planning your loadout around the specific dungeon type you intend to run will yield the best results.
During combat encounters, use the side-scrolling environment to manage enemy positioning. Kiting aggressive creatures through corridors can thin out packs and reduce incoming damage, while positioning yourself carefully during area-of-effect attacks from boss creatures prevents unnecessary hits. When multiple enemies spawn during a boss fight, focus on indirect methods of clearing adds when possible to avoid triggering additional penalties.
Time management is ultimately the most critical strategic consideration. Every dungeon run costs time, and failed runs or inefficient captures eat into your repayment window. Set clear objectives for each run—whether it is targeting specific creature types, gathering resources, or pushing deeper into a new dungeon—and exit promptly once your goals are met rather than lingering for diminishing returns.